Cinematic Wedding Videos: What They Are and How to Make Them

Couples want to remember every second of their special day — that’s where you come in. While they’re dancing the night away, cutting the cake and sneaking tender glances at one another across the room, you’re slipping through the crowd, stealthily capturing it all. 

The best videographers constantly learn new styles, embrace new techniques and put in their all to match their final video with the vibe of the wedding and couple. An excellent way to expand your repertoire is to explore making cinematic wedding videos. 

What Are Cinematic Wedding Videos?

Brides.com identifies five types of wedding videography styles:

  • Cinematic
  • Documentary
  • Traditional
  • Storytelling
  • Vintage 

While all these styles have their attributes, only one makes the couple feel like they’re watching a polished film. Cinematic wedding videos are luxurious, purposeful and full of spectacle. They’re distinguished by carefully selected music, a balanced mix of short and long shots, stunning aerial views, slow-motion clips, and intimate close-ups. Balancing the couple’s story with these more creative elements is the key to unlocking a cinematic wedding video as precious as sapphire. 

Cinematic Wedding Video Tips

These tips can help you create a crystal-clear wedding video. 

4 Tips for Preparing for the Shoot

Creating a beautiful cinematic video starts with practical preproduction planning:

  1. Discuss the vision with the couple: Meeting with the couple establishes their goals and ensures your visions harmonize. You can ask them for samples of videos or shots they love and discuss music, coloring, filters and video length. 
  2. Contact the wedding locations and vendors: Know where you can and cannot film before sitting down to create a storyboard. This is especially important if the couple is getting married in a church, as churches often have specific rules restricting where you can film. 
  3. Storyboard and identify the story you want to tell: Think of your storyboard as your blueprint. You can plan specific shots, such as an aerial view of the venue, wide shots of the couple’s first dance, close-ups of their faces as their friends make toasts, and a final cinematic shot of their hands intertwined on the way out of the ceremony. Also, find the story you want to tell. For example, will your video be chronological, or will you take a different approach?
  4. Prepare for low-light and other nonideal conditions: Try as they might, couples cannot control the weather on their wedding day. If rain changes the lighting — or causes the wedding or reception to move indoors — you have to be prepared. 

4 Tips for the Day of the Wedding

On the day of the wedding, consider these tips for a successful shoot: 

  1. Get enough shots: While you’ll have to whittle them down at some point — more on that later — you’ll want more than enough shots going into post-production. 
  2. Slow down in the right parts: Maybe you’ll slow things down during the aisle walk to see each partner’s face, catch them getting into a car after the wedding or sneak in a close-up of them feeding each other cake. Plan ahead so that you can film these clips at a higher-than-normal frame rate setting, like 120 frames per second (fps). During editing, you can stretch the footage back out to the normal 24 fps.
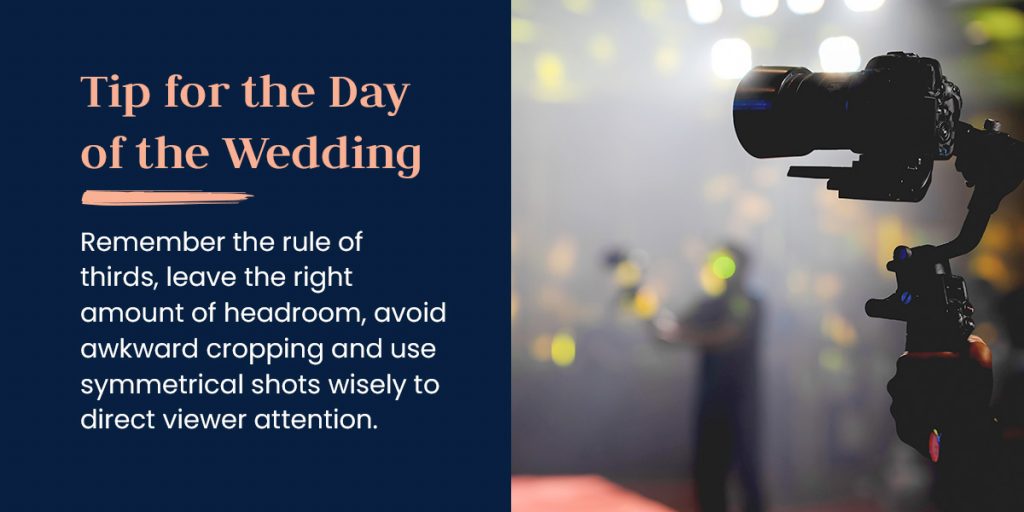
  3. Rely on tried-and-true composition techniques: A skilled editor can seemingly work magic on raw footage, but there is a line. The best edits result from high-quality footage. Remember the rule of thirds, leave the right amount of headroom, avoid awkward cropping and use symmetrical shots wisely to direct viewer attention. 
  4. Shoot with the edit in mind: Make things easier for yourself or your editor by planning your shots, shooting with transitions in mind, keeping camera settings consistent, investing in high-quality audio equipment and remembering the story at the heart of your video. You can also vary the cuts. Hard cuts are effective, but you can also shake things up with crosscuts, J-cuts, L-cuts or match cuts. 
tips for the day of the wedding

5 Tips for Editing Your Footage

Editing is one of the major factors that differentiate cinematic wedding videos from other styles, such as documentary-style videos. Documentary videos take a simpler, “hands-off” approach to editing, while cinematic videos are lush and story-driven. Here are some tips for editing a cinematic wedding video: 

  1. Strike the right balance with special effects: Cinematic wedding videos typically involve more special effects than traditional or documentary filming styles. However, too many can make a film feature gimmicky, unbalanced or overly busy. Use black-and-white filters, time lapses and drone footage wisely to strike the right emotional chord without overdoing it. 
  2. Edit out unnecessary footage: You may love each second of your footage, but not every second has a spot in the final product. Thanks to their film-like nature, cinematic wedding videos are often longer than other styles, but you’ll still have to make those tough editing decisions. 
  3. Choose music wisely: Music is a powerful tool for taking a video from footage to film. Of course, there’s still something to be said about not overdoing it, but the right music can set the mood, establish the atmosphere and tie everything together. You can also ask the couple during the planning stages if there are any songs they want to be included in the video and let those choices influence the storyboard, the shoot and the edit. 
  4. Use a mix of short and long shots: Keep things engaging and add balance by editing varied shot lengths together. For example, bookending a longer shot of a bride walking down the aisle with shorter shots of her mother helping her with her veil and her fiance’s face right as they come together can add the appropriate gravitas to the aisle walk. 
  5. Outsource editing to an expert editor: Editing is a time-consuming task that requires a high level of detail and precision. If you’re booked every weekend with weddings for the foreseeable future — or just want that professional touch — consider working with an expert wedding video editor. They’ll strive to understand and accentuate your style while ensuring all those hidden smiles and stolen touches make it into the final product. 

Add Some Sparkle to Your Cinematography With Uncut Gems

The perfect wedding video is many things. It’s satisfyingly emotional, perfectly romantic, powerfully evocative and an amazing time capsule of a once-in-a-lifetime day. When you want to ensure the edit is as stunning as your footage, you can trust Uncut Gems. 

We edit narrative feature films that incorporate music, dialogue and natural audio from the day to tell the complete story of the wedding. You can tailor your editing package to suit your needs, and we’ll also pair you with a dedicated account manager and an expert editor to ensure clear communication and a cohesive edit. Create your free account to register with Uncut Gems today!


a blue background with the words add some sparkle to your cinematography with uncut gems

A Guide to Wedding Video Lengths & Turnaround Times

Editing a wedding video to give your clients the amount of content they want within their expected timeframe can be a challenge. Many videographers are unsure about how long their final cuts and turnaround times should be. 

From backing up the raw footage through sorting and editing to exporting the final cut, many variables impact how long post-production takes. Timing becomes even more complex during peak season when you’re managing a backlog from all the other weddings you’ve shot.

This article will help you manage client expectations for video lengths and turnaround times while streamlining your process for faster results.

How Long Does a Wedding Video Take to Edit?

Although a videographer can edit a typical wedding video in about two weeks, two to three months is the normal turnaround time from the wedding day to exporting the final product. The difference between the actual editing time and the total turnaround time typically comes from backlogs that videographers must work through from the previous season’s weddings.

Factors Influencing Turnaround Time

Though the average turnaround time for wedding videos is two to three months, several factors can impact how long it takes you to edit and return a given video. These include:

  • Backlog: The longer your queue of videos to edit is, the longer it will take you to turn the latest one around.
  • Wedding timing: Your backlog will likely be smallest in Spring and largest in Fall, so videos you shoot during or shortly after Fall will take longer to finish editing.
  • Amount of footage: More footage can ensure you have the shots you need but may take more time to sort through.
  • Quality of footage: Better raw footage needs less work in post-production. For example, if you find lighting issues in shots you need to use, you’ll spend extra time fixing these.
  • Equipment and software: The capabilities of your camera, lenses, computer and editing software can all impact how long editing takes you.
  • Video duration: Longer videos take more time to edit, though choosing the right footage for short ones can also be time-intensive.
  • Video style: Some stylistic effects clients request take longer to edit. Your personal style may also be more or less editing intensive.
  • Personal circumstances: Wedding videographers are human, too! Life happens, and sometimes personal situations cause delays in your workflow.

How Long Should a Wedding Video Be?

How Long Should a Wedding Video Be?

Common wedding video lengths range from less than a minute to around 90 minutes. The range is so broad because there are different styles of wedding videos, each with a different average length. It’s important to be clear about the types of videos you offer and the duration your clients can expect from each.

Here’s a quick guide to the main types of wedding videos and how long the average final cuts are for each type. Some wedding videographers offer other options like full ceremony videos, full speech videos or multiple lengths of highlight films for clients to choose from. Different brands also describe these video types with different names. The following list will give you a good idea of how to structure your offerings and where to set client expectations:

  • Teaser: A teaser or trailer video usually lasts for a minute or less. Some videographers release this early to get the couple excited for a longer video in the works. You could also present this as a social media edit.
  • Highlight film: A typical wedding highlights film lasts two to six minutes. Some videographers break this category into two to four and four to six-minute options. It condenses the day’s key moments and most beautiful shots into a compact package.
  • Extended or narrative highlights: Many videographers present an option between their standard highlight video and their feature edit. This could be an extended or narrative highlight film. An edit in this category will likely run for six to 10 minutes.
  • Feature film: A feature film is a cinematic edit that tells the wedding day’s story. Shots may or may not be in chronological order. The standard duration for these films is 16 to 20 minutes.
  • Documentary edit: This is a long edit that includes at least the entire ceremony and main events from the reception from start to finish. Often, shots of the bridal preparations are also shown. A documentary edit could be anywhere from 30 to 90 minutes.

Five Tips to Balance Turnaround Time, Length and Quality

As a wedding videographer, your business grows when you complete as many high-quality videos as possible that meet or exceed your client’s expectations. But it can be tricky to balance faster turnaround times and expected video durations with your high standards as a creator. Here are five tips to give customers what they want, when they want, while preserving your work’s quality:

  • Standardize offerings: Have a few standard video types with set durations for clients to choose from. You’ll know what to deliver and your clients will know how long your wedding videos are.
  • Communicate timelines: Communicate your turnaround times clearly on your website and during your client onboarding process. If you run into any delays, be proactive about letting your client know. 
  • Pad your turnaround: Set slightly longer turnaround times than you think you’ll need to avoid over-promising.
  • Consider seasonality: You’ll be much busier and have more of a backlog at some times of year than others. You can manage this by offering shorter turnaround times in quieter months or setting higher prices for your busiest months.
  • Outsource editing: Outsource some or all of your video editing to a professional editing partner. This can clear your backlog so you can complete more videos with shorter turnaround times or charge more for returning videos faster than other videographers. Outsourcing is especially effective when you’re trying to keep up and maximize your earnings during peak wedding season.

Achieve Faster Turnarounds With Uncut Gems

Outsourcing your editing is a top strategy for accelerating your turnarounds, streamlining your workflow and scaling your videography business. Choose Uncut Gems to carve out the diamonds from your raw footage while you move on to more clients, more earnings and better work-life flexibility.

The professional editors at Uncut Gems are dedicated to delivering fast, quality edits from your wedding footage. We pay attention to your editing style requests and focus on upholding your quality standards while speeding up your turnarounds so you can focus on filming and growing your business.

Our standard edits include:

  • Instagram edits (1 minute)
  • Highlight edits (2-3 or 4-6 minutes)
  • Narrative highlight edits (6-8 minutes)
  • Feature film edits (16-20 minutes)
  • Documentary edits

Join our Carat Club for an exclusive annual membership to save up to 40% on all your orders.

Achieve Faster Turnarounds With Uncut Gems

Top 10 Tips for Enhancing Your Wedding Video Content

At Uncut Gems, we don’t just edit your wedding videos, we enhance them. Here, we’ve compiled our top 10 tips to help you get the most out of your wedding footage.

1. Choose the Right Moments

Not all footage is created equal. Make sure you’re picking the most memorable, emotional, and unique moments to include in your final cut.

2. Quality Over Quantity

It can be tempting to include everything, but a shorter, well-edited video can often be more powerful and enjoyable than a longer one that includes every moment of the day.

3. Consider the Soundtrack

Music can make or break a video. Choose songs that not only fit the mood of your footage but also hold personal significance for you and your partner.

4. Pay Attention to Transitions

Good transitions can smoothly guide viewers from one scene to the next. Avoid jarring or abrupt cuts that can interrupt the flow of the video.

5. Use Effects Sparingly

Special effects can be fun, but they can also be distracting. Use them sparingly and only when they truly add to the video.

6. Incorporate Speeches

Including snippets of speeches can add a narrative element to your video and give it more depth.

7. Color Grade Your Footage

Color grading can give your video a more polished, professional look. It can also help set the mood and aesthetic of your video.

8. Include Candid Moments

Candid moments often capture the joy and emotion of the day more effectively than staged shots. Make sure to include these in your video.

9. Tell a Story

A good wedding video should tell the story of your day. Make sure your video has a clear beginning, middle, and end.

10. Get Professional Help

Editing a video can be time-consuming and challenging. Consider hiring a professional video editing service like Uncut Gems to ensure your video is the best it can be.

Remember, every wedding and every couple is unique. These tips are meant as a guide, but the most important thing is that your video reflects you and your special day.

Explore editing services

Mastering Video Editing for Social Media: A Comprehensive Guide

In today’s digital age, social media has become an integral part of our lives. As a content creator or marketer, you understand the power of video in engaging your audience. However, each social media platform has its unique requirements when it comes to video formatting and resolution. In this blog post, we’ll provide you with valuable tips and tricks to help you edit wedding videos for various social media platforms effectively.

1. Understand the Platform:

Before diving into the editing process, familiarize yourself with the video requirements of each social media platform. Here are some key considerations:

  • Instagram: Supports both square (1:1) and vertical (9:16) videos. The recommended resolution for square videos is 1080×1080 pixels, while vertical videos should have a resolution of 1080×1920 pixels.
  • Facebook: Supports square (1:1), vertical (4:5), and landscape (16:9) videos. For optimal quality, use a resolution of 1080×1080 pixels for square videos, 1080×1350 pixels for vertical videos, and 1080×608 pixels for landscape videos.
  • YouTube: Supports various aspect ratios, including landscape (16:9), square (1:1), and vertical (9:16). Aim for a resolution of 1080p (1920×1080 pixels) or higher for the best viewing experience.
  • Twitter: Supports landscape (16:9) and square (1:1) videos. A resolution of 1280×720 pixels is recommended for landscape videos, while square videos should be 720×720 pixels.
  • TikTok: Primarily caters to vertical (9:16) videos. The recommended resolution is 1080×1920 pixels.

2. Plan Your Video Composition:

Understanding the platform’s requirements, you can plan your video composition accordingly. Frame your shots with the platform’s aspect ratio in mind. Keep the most important elements within the safe zone, considering potential cropping on certain platforms.

3. Optimize Video Length:

Different social media platforms have varying preferences for video length. Consider the following guidelines:

  • Instagram and Twitter: Shorter videos, typically under 60 seconds, tend to perform better. Focus on concise storytelling and capturing attention quickly.
  • Facebook and YouTube: Longer videos, ranging from a few minutes to several hours, can be more successful on these platforms. However, it’s crucial to maintain engagement throughout the video by utilizing editing techniques like jump cuts, visuals, and compelling storytelling.

4. Maintain Quality:

To ensure your videos look professional across all platforms, adhere to the following quality guidelines:

  • Resolution: Always use high-resolution footage and export your videos in the recommended resolution for each platform.
  • Aspect ratio: Avoid stretching or distorting the video. Instead, resize or crop it to fit the desired aspect ratio, ensuring the content remains intact and visually appealing.
  • Compression: Compress your videos without compromising quality to reduce file size. Many video editing software options provide optimized export settings for social media platforms.

5. Captions and Subtitles:

Including captions or subtitles in your videos can greatly enhance accessibility and engagement. While some platforms automatically generate captions, it’s best to create your own for accuracy and customization. Utilize editing software that allows you to add captions or import subtitle files.

6. Add Eye-catching Thumbnails:

Thumbnails play a vital role in attracting viewers to your videos. Craft visually compelling thumbnails that accurately represent the video’s content and entice users to click and watch.

By understanding the specific formatting and resolution requirements of each social media platform, you can optimize your videos for maximum impact. Planning your video composition, considering video length, and maintaining high-quality visuals are key elements of successful video editing for social media. Remember to stay up-to-date with any changes in platform guidelines to ensure your content continues to engage and resonate with your target audience. Happy editing!